
 English
 Français
 Español

Home / News / Industry News / How to loop a ratchet strap: Applications, Selection Criteria, and Practical Guidance
How to loop a ratchet strap: Applications, Selection Criteria, and Practical Guidance
2026-10-30
Loop the webbing right the first time
A ratchet strap only delivers its rated holding force when the webbing is looped through the spool in the correct direction. In our factory tests at Xstrap, the most frequent cause of a strap that slips or releases is not broken webbing — it is a strap that was threaded over the top of the spool instead of underneath it. When the load pulls on the loose end, a mis-threaded strap unwinds from the spool and drops the cargo. Getting the loop direction right takes seconds and prevents the most dangerous failure mode in cargo securement.
The core rule is simple: open the handle fully, feed the webbing from underneath the spool and in through the slot, then close the handle and let the pawl engage before you add tension. Once the handle is closed, each stroke of the handle rotates the spool and winds the webbing around it. The fixed end of the strap should already be connected to the ratchet housing, and the loose end is the part you thread through the spool. If you follow the under-the-spool path, the strap grips itself when tension increases instead of slipping.
Working in a factory that builds straps for export markets, we see the same confusion from first-time buyers and experienced drivers alike. Some operators think the handle position decides the thread direction. It does not. The spool is a cylinder with a slot in the middle. The webbing enters that slot from the bottom, comes out the other side, and leaves a tail long enough to grip. The handle only locks and rotates the spool. Once you picture the spool as the anchor point of the whole system, the correct loop becomes obvious.
Know the parts before you thread
You cannot loop a strap correctly if you do not know which part does what. Every Xstrap ratchet strap, from the light-duty 1-inch versions to the heavy 4-inch models, uses the same operating principle. The components are few, but each one matters during the looping process.
Fixed-end webbing
This section is permanently sewn to the ratchet assembly. It wraps around an anchor point on the vehicle or trailer and does not move during tensioning.
Loose-end webbing
Also called the cargo-end webbing. This is the part you thread through the spool, then hook or wrap around the load before you start ratcheting.
Spool with slot
The cylindrical bar in the center of the ratchet. It has a slot that accepts the webbing. The slot is the only place the loose end should pass through.
Handle and pawl
The handle rotates the spool. The pawl is a spring-loaded tooth that locks into the gear teeth on the spool so the webbing cannot unwind while you pull.
Hooks and end fittings
Flat hooks, wire hooks, S-hooks, chain anchors and loop ends connect the strap to the vehicle. Hook choice affects where and how the strap pulls, but it does not change the threading path.
| Component | Function | Check before threading |
|---|---|---|
| Spool slot | Accepts the loose-end webbing and locks it when tension builds | Slot is clear of dirt, rust or crushed webbing |
| Handle | Lever that rotates the spool and applies tension | Handle opens fully to the flat position |
| Pawl and gear teeth | Prevents the spool from reversing during loading | Pawl springs back freely; teeth are not worn down |
| Fixed-end webbing | Carries load from the ratchet to the anchor point | No cuts, fraying or broken stitches near the sewing |
| Loose-end webbing | Wraps around cargo and feeds into the spool | Completely untwisted before you start |
Step-by-step: how to loop a ratchet strap
The method below works for standard industrial ratchet straps in 1-inch, 2-inch, 3-inch and 4-inch widths. The only difference between sizes is the width of the slot; the path of the webbing stays the same.
Step 1: Lay the strap out flat and untwist it
Before you touch the ratchet, pull the entire strap out of the storage coil and lay it flat on the ground. Remove every twist from both the fixed end and the loose end. A twisted strap that enters the ratchet will stay twisted during loading and can reduce the effective strength of the webbing by a significant margin. It also creates uneven pressure on the load. This step is quick, but it is the one that most often gets skipped by experienced operators who think they can fix the twist later.
Step 2: Open the handle completely
Pull the ratchet handle up and open it until it is fully extended, roughly in line with the fixed-end webbing. The handle must reach the full open position. If the handle is only half open, the spool and the frame do not separate far enough, and the webbing cannot pass through the slot cleanly. You will feel resistance if you try to force the webbing through a partially opened ratchet. Do not force it. Open the handle further.
Step 3: Feed the loose end under the spool and through the slot
Take the loose end of the webbing and bring it underneath the spool, then push it up through the slot in the middle of the spool. The webbing should enter from the bottom and exit on the top side of the spool. This direction is critical. If you lay the webbing over the top of the spool without passing it through the slot, the strap will look correct when you close the handle but will release as soon as the load pulls on it. The spool needs a full wrap of webbing around it before the pawl can lock the tension.
On Xstrap wide-handle ratchet straps, the slot is wide enough for the full strap width, so the webbing should sit flat in the slot with no folds on either edge. If the webbing catches or bunches, lift the handle slightly to open more space between the spool and the frame, then slide the webbing again.
Step 4: Pull the webbing through to create a tail
Pull the loose end through the spool until at least 25 to 30 cm (10 to 12 inches) of webbing extends past the ratchet. This tail gives the spool enough material to grip when you close the handle. A very short tail is one of the main causes of straps that slip under vibration. The webbing needs a mechanical lock around the spool, and that lock is only as strong as the amount of webbing actually wrapped inside.
If your strap has a sewn loop or a hook on the loose end, keep pulling until the hardware clears the ratchet completely. Do not let the hook sit inside the slot while you close the handle, because the metal hardware can damage the gear teeth.
Step 5: Close the handle and confirm the pawl engages
Fold the handle back down toward the fixed end until it latches. You should hear or feel the pawl clicking against the gear teeth. If the handle closes without any click, the pawl may not be seated. Open the handle, push the webbing slightly deeper into the slot, and close it again. Do not start tensioning until the pawl is definitely engaged. A handle that closes loosely will rotate backward under load and release the strap.
Step 6: Hook both ends and remove slack by hand
Attach the fixed-end hardware to the vehicle anchor point and the loose-end hardware to the other side of the load. Pull the loose end as tight as you can by hand. Removing slack manually before you use the ratchet saves several full strokes of the handle and reduces the stress on the spool during the first winding.
Step 7: Ratchet in full strokes and check the tail
Pump the handle in full strokes, not short partial movements. After three or four strokes, stop and look at the tail coming out of the ratchet. The tail should be pulling tight around the spool, and the webbing should be winding evenly with no edges folded. If the tail starts to slip or the webbing bunches on one side, open the handle and re-thread. A strap that loads unevenly at the start will only get worse as tension increases.
Alternative method: wrap-around threading for stiff or worn webbing
Some older straps develop a crease where the webbing has been folded for years, and the crease can make slot threading difficult. For these straps, use the wrap-around method. Open the handle fully, wrap the loose end once around the spool by hand, then close the handle and ratchet normally. This method works because the full wrap gives the spool immediate contact with the webbing surface. Use it only when the webbing is too stiff to pass through the slot easily. For new straps, the standard slot method is cleaner and safer.
How to check before you pull the load
After the strap is tensioned, walk around the vehicle and check three points: both hook connections are fully seated, the webbing has no twists between the hooks and the ratchet, and the tail of the webbing passing through the spool is straight and flat. If any point fails, release the tension and correct it before moving the vehicle. A quick check takes one minute and eliminates the majority of load-securement failures.
Choose the right strap width for the load
Looping technique matters, but the strap width determines whether the loop can actually hold the cargo weight. Each webbing width has a working load limit that is printed on the label sewn into the strap. The table below summarizes the typical range you will see across the Xstrap product line. Always verify the specific label on your strap, because end fittings and stitching can change the rating.
| Webbing width | Typical working load limit | Typical breaking strength | Common applications |
|---|---|---|---|
| 1 inch | About 500 to 733 lb | About 1,500 to 2,250 lb | Motorcycles, ATVs, small loads, luggage |
| 2 inch | About 1,100 to 1,300 lb | About 3,300 to 3,900 lb | Flatbed cargo, vehicles, trailers, general hauling |
| 3 inch | About 2,000 to 2,650 lb | About 6,000 to 7,950 lb | Heavy equipment, machinery, large flatbed loads |
| 4 inch | About 2,600 to 3,300 lb | About 8,400 to 10,000 lb | Coils, heavy machinery, oversized cargo |
For a typical pickup truck load or a small trailer, a 2-inch ratchet strap is the most practical choice. It provides enough strength for most cargo weights, fits standard anchor points, and the webbing is flexible enough to route around sharp edges. Choose 3-inch or 4-inch straps for heavy steel, concrete elements, machinery and other loads that exceed the working load limit of a 2-inch strap. When in doubt, select the wider strap. The cost difference is small compared with the cost of a dropped load.
 Xstrap 2-Inch Wide-Handle Ratchet Strap with Chain Hooks, 30-FootThis 2-inch ratchet strap offers a 3,333-lb working load limit and easy threading, making it the practical choice for typical pickup and trailer loads.View Product →
The Xstrap 2-inch wide-handle ratchet strap is our most popular export model because it balances strength, ease of threading and compatibility with standard truck anchor points. The wide handle gives better leverage and reduces the effort needed to reach the working load limit, which matters when you secure several straps in a row.
 Xstrap 3-Inch Ratchet Strap with Flat Hooks, 27-FootWith a 5,000-lb working load limit and wider webbing, this strap suits heavier machinery and construction loads while protecting cargo surfaces.View Product →
For heavier machinery and construction loads, the 3-inch ratchet strap with flat hooks provides roughly double the working load limit of a 2-inch strap. The wider webbing also spreads the pressure across the cargo surface, which protects the material you are carrying.
 Xstrap 4-Inch Ratchet Strap with Flat Hooks, 27-FootDesigned for the heaviest flatbed work, this 6,000-lb capacity strap handles machinery and steel, though its weight suits professional use more than daily hauling.View Product →
At the top of the standard range, the 4-inch ratchet strap is designed for the heaviest flatbed work. Its wider spool requires the same looping technique, but the slot opening is larger, so the threading motion is easier to see and control. Keep the 4-inch strap for loads that genuinely need it; its weight and stiffness make it less convenient for everyday household hauling.
Apply the right tension: how much is enough
Looping the webbing correctly is only half the job. The strap must also be tensioned to the right level. Too little tension allows the cargo to shift; too much tension can damage the webbing, bend the handle or deform the cargo. The chart below shows a typical tension buildup during successive ratchet strokes on a 2-inch strap rated at about 1,100 lb working load.
120 lb
Stroke 1
280 lb
Stroke 2
520 lb
Stroke 3
780 lb
Stroke 4
1,050 lb
Stroke 5
1,100 lb
Stroke 6
Illustrative tension curve for a 2-inch ratchet strap with an 1,100 lb working load limit. Actual values vary with strap length, condition and handle geometry.
The chart shows the practical limit of most ratchet straps. After about five or six full strokes, an additional stroke adds almost no tension and starts to over-stress the webbing. The webbing reaches a point where the fibers cannot stretch further, and continued ratcheting only loads the metal components. If you need more tension after six strokes, the load is too heavy for the strap, or you did not remove enough slack by hand before starting.
- Use the palm of your hand for the final strokes. If you need a pipe or a cheater bar to get more tension, you are exceeding the working load limit.
- Listen to the strap. A high-pitched creaking sound from the webbing means the fibers are near their load limit.
- Check the tension after the first few kilometers of driving. Loads settle, webbing stretches slightly, and hooks seat more deeply. Re-tighten with one or two strokes, then recheck.
- Never stand in the direct line of a tensioned strap. If a hook fails, the stored energy in the webbing releases in a straight line.
Six common looping mistakes and how to avoid them
Even trained operators make looping mistakes when they work quickly or use unfamiliar straps. The table below lists the six most common errors we see in the field and in the photos customers send to our factory support team.
| Mistake | What happens | How to avoid it |
|---|---|---|
| Looping the webbing over the top of the spool instead of underneath | The strap slips and releases under load because the spool never grips the webbing | Always bring the loose end from underneath the spool and up through the slot |
| Threading the webbing beside the slot instead of through it | The webbing jams between the spool and the frame, making the handle impossible to turn | Look for the slot opening before you push the webbing; align the webbing with the slot width |
| Leaving a tail shorter than 10 inches | The webbing slips out during vibration on the road | Pull through at least 25 to 30 cm of tail before closing the handle |
| Closing the handle with twisted webbing in the slot | The strap loads unevenly, reduces effective strength and can tear at the fold line | Straighten the full length of webbing before you start threading |
| Ratchet with the handle not fully open | The webbing cannot pass through the slot cleanly and the pawl may not engage | Open the handle to the full flat position and confirm the click before tensioning |
| Keeping a pair of hooks at different heights | One strap carries most of the load and the other remains loose | Position anchor points at roughly the same height on both sides of the cargo |
Which mistake is the most dangerous? Looping over the top of the spool, because the strap appears to be correctly installed when the handle is closed. The load moves a few meters down the road, the webbing unwinds, and the cargo shifts without warning. If you are ever unsure whether a strap is threaded correctly, open the handle and look at the spool. If the webbing does not pass through the slot and around the spool, re-thread it before moving the vehicle.
How to release a ratchet without damaging the webbing
Releasing a ratchet strap is the reverse of the loading process, but it requires attention because the webbing is under full tension. To release, open the handle fully so that the pawl disengages from the gear teeth. Pull the handle backward and upward in one smooth motion. The spool will rotate freely, and the webbing can be pulled out of the slot. Keep one hand on the loose end while you release so the webbing does not whip across the cargo. If the pawl sticks and the handle will not open, apply a small amount of pressure to the tail of the webbing to relieve tension on the gear teeth, then try again.
Do not cut a tensioned strap to release it. Releasing the stored energy by cutting can cause serious injury, and it destroys the strap. Instead, read our guide on how to loosen ratchet straps and release stuck ratchets for a complete breakdown of jammed pawls, seized handles and the safest release sequence for frozen mechanisms.
After releasing, pull the webbing out of the spool, lay the strap flat and inspect the section that was wrapped around the spool. This area takes the most abrasion and is the first place you will see wear. For complete daily inspection practices, see our article on how to use ratchet tie-down straps correctly, including the inspection checklist recommended for fleet operators.
To keep the ratchet mechanism operating smoothly, apply a light machine oil to the gear teeth and the pawl pivot point once a month. Wipe off excess oil so it does not collect dust and grit. Never oil the webbing itself; oil weakens the polyester fibers and attracts dirt that abrades the strap from the inside. During winter, check the ratchet for moisture and remove any ice before use.
Load ratings and certification: read the label before you loop
Every ratchet strap we manufacture carries a label that states the working load limit and the breaking strength. The working load limit, sometimes labeled SWL, is the maximum force the strap should carry in normal service. The breaking strength is the point at which the webbing fails in a straight pull test. For polyester tie-down webbing, the ratio between the two is generally around 3 to 1. That means a strap with a 1,100 lb working load limit typically breaks at about 3,300 lb. The safety margin exists because real-world loads include vibration, shock loading and the effects of knots or hardware.
| Rating | Meaning | Why it matters when looping |
|---|---|---|
| Working load limit (SWL) | Maximum recommended force during normal use | Never add more ratchet strokes once the SWL is reached |
| Breaking strength | Point where the webbing fails under test | Only a 3 to 1 margin separates a safe load from a failure |
| Certified strap label | Independent testing by a notified body like GS or TUV | Guarantees the rated values match real production samples |
| Woven edge condition | The edges of the webbing are the weakest point | A twisted loop concentrates load on one edge and can cut the strap |
When you loop a ratchet strap, think about the label as part of the task. If the strap has no label, or the label is worn and unreadable, do not use it for load securement. The absence of a label means the rated capacity cannot be verified. This is especially important for buyers sourcing straps in bulk. Straps from an unverified source may have optimistic labels that do not match real performance. In our export production for customers in Europe and North America, every batch is tested to confirm the printed ratings, and straps destined for regulated market segments carry GS or TUV certification.
The certification also matters for looping behavior. Certified straps use higher-grade webbing that resists stretching and keeps a consistent slot fit. A low-quality strap may have webbing that is narrower than the nominal width, allowing it to shift inside the spool and slip during loading. If you notice a strap that rattles inside the spool slot, measure the webbing width and compare it with the label. A genuine 2-inch strap should measure close to 50.8 mm (2 inches) across the full width.
Frequently asked questions about looping ratchet straps
Do I loop the webbing over or under the roller?
Always feed the webbing from underneath the spool, up through the slot. Looping over the top of the roller without passing through the slot leaves the strap with no grip, and it will slip as soon as the load pulls on it. The webbing must wrap around the spool inside the ratchet housing.
Why does my ratchet strap slip when I start ratcheting?
Most often the webbing was threaded over the top of the spool instead of through the slot, or the handle was not fully open when you pushed the webbing in. Open the handle completely, re-thread from underneath, and confirm the pawl clicks before you pump the handle.
Can I use a 2-inch strap in a 3-inch ratchet?
No. The slot is sized for the nominal webbing width, and a narrower strap will move sideways inside the spool. This reduces the gripping surface and can cause the strap to tear at the edge of the slot. Use the matching width for the ratchet mechanism.
How much tail webbing should I leave after threading?
Leave at least 25 to 30 cm (10 to 12 inches) of tail beyond the ratchet. This amount gives the spool enough surface contact to create a mechanical lock. A shorter tail can slip under vibration, especially on rough roads.
Does a twist in the webbing really matter?
Yes. A twist concentrates the load onto one edge of the webbing, which can cut the fibers and significantly reduce the breaking strength. Always lay the strap flat and remove twists from both the fixed end and the loose end before threading.
When should I replace a ratchet strap?
Replace the strap immediately if you see cut or frayed webbing, broken stitches near the hooks or the ratchet, a bent handle, worn gear teeth, or a pawl that does not spring back. A strap that fails the visual check cannot be made safe by careful looping.
Popular Products
Recent News
 How Do You Choose the Right Utility Tie Downs and Bungee Cords for Your Needs
Introduction
When it comes to securing your gear for transport, storage, or organization, Utility Tie Downs and Bungee Cords are essential tools. Whether you're hauling heavy loads...
 The Ultimate Guide to Ratchet Straps: Choosing, Using, and Maintaining Them
Introduction to Ratchet Straps
What Are Ratchet Straps?
Ratchet straps, also known as tie-down straps or cargo straps, are a type of load securement tool widely used in transportat...
 How Can Ratchet Tie Down Standard Duty Straps Ensure Safe and Reliable Cargo Securement
What Are Ratchet Tie Down Straps and Why Are They Important for Cargo Securement?
Introduction to Ratchet Tie Down Straps
Ratchet tie down straps are essential tools for anyone inv...
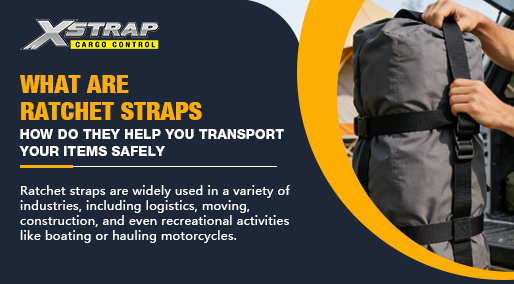 What are Ratchet Straps and how do they help you transport your items safely
What Are Ratchet Straps?
Ratchet straps, also known as ratchet tie-downs or cargo straps, are heavy-duty fastening tools designed to secure items during transportation. They consis...
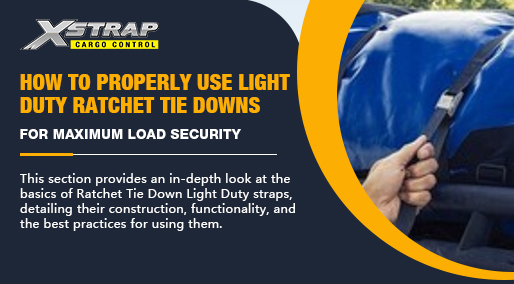 How to Properly Use Light Duty Ratchet Tie Downs for Maximum Load Security
Understanding the Basics of Ratchet Tie Down Light Duty Straps
Ratchet tie-down straps are a critical tool in the transportation, storage, and securement of goods. They are used to...
-
 +86-18112697781qindan355@gmail.comNo. 21 Yuefeng Road, Yangshe Town, Zhangjiagang City, Suzhou City, Jiangsu Province
-
Quick Links
Social Media
-
OEM Partner
-


Copyright © 2025 Zhangjiagang SMK MFG. Co., Ltd. All rights reserved.
 Wholesale Tension Strap Manufacturers